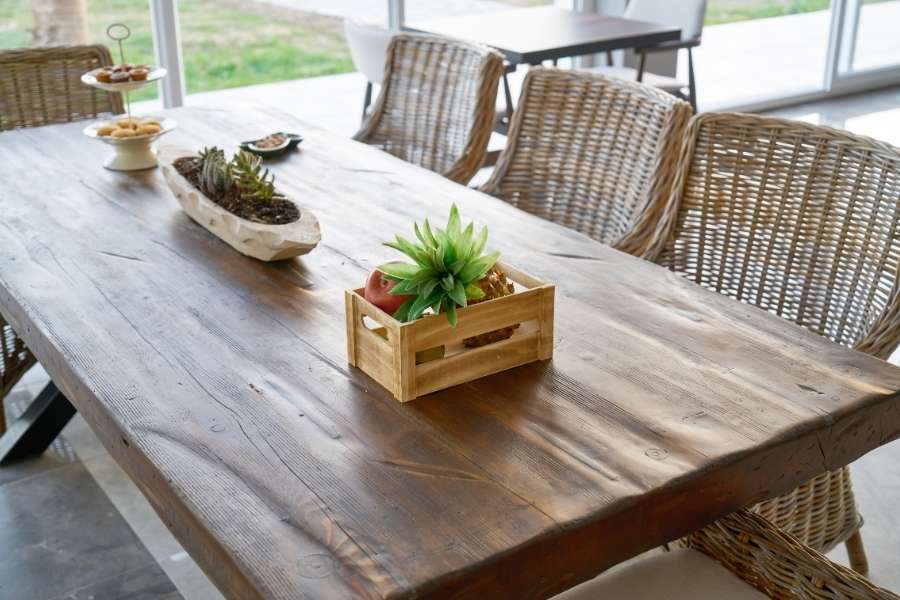
Do you have a scratched, tired piece sitting in your home? You can bring that beat-up family heirloom back to life without expensive shop machines. Giving an old wooden table a fresh start takes only simple supplies, patience, and some elbow grease. Ready to see the rich wood hiding right under that ugly grime?
Why You Should Restore an Old Wooden Table Yourself
Solid antique furniture holds up far better than modern flat-pack boards. Most surface flaws like rings and scratches sit strictly in the dead topcoat. The real timber underneath remains completely sound, strong, and full of natural life. Taking on this project lets you keep the authentic history of the piece. You save cash while tackling basic home improvements yourself, much like learning a quick toilet running fix in 10 minutes to resolve common household plumbing issues without hiring outside help. Hands-on restoration gives you complete control over every single detail.
Before you touch any sandpaper, inspect the grain pattern underneath. Make sure your piece is solid timber rather than a manufactured substrate. Check all four legs and frame joints for any loose structural movement. Firm up wobbly parts with wood glue and standard ratchet straps first. Fixing joints now guarantees your table stands firm for daily family use. It takes little effort and saves huge headaches down the road.
Hand Tools Replace the Need for an Orbital Sander
You do not need an orbital sander to get smooth, flawless furniture boards. Power tools spin fast and can leave ugly swirl marks across the wood. Working with hand tools keeps your room peaceful, clean, and safe. Hand sanders give you total control over delicate, historic surfaces. You will feel high spots and dips that power machines easily miss. It is the cleanest way to preserve the authentic shape of the wood.
- A flat rectangular hand-sanding cork block
- A sharp card scraper blade with clean edges
- A pack of coarse, medium, and fine grit sandpaper
- A natural bristle brush and synthetic scrubbing pads
- A clean bottle of mineral spirits
- Chemical-resistant gloves and protective eye goggles
- Clean, lint-free cotton wiping rags
- A can of wood stain and paste wax
Safe and Simple Workspace Setup at Home
Set up your work area in a dry, well-ventilated garage or patio. Open two opposing windows wide to maintain continuous, fresh cross airflow. Lay heavy canvas drop cloths across your floor to catch all mess. Avoid light plastic sheets because wet chemical drops make plastic very slippery. Canvas stays flat on your floor and absorbs liquid drips right away. Preparing your space carefully is just as essential as following a new shower head DIY install guide to prevent accidental water damage in your bathroom. Setting up correctly keeps your workspace tidy, dry, and secure while you scrape.
Good lighting helps you see tiny scratches before you start staining. Prop your table up on scrap wood blocks or simple sawhorses. Raising the work height keeps your back straight and prevents muscle strain. Keep your scraping tools, rags, and solvents organized on a nearby table. A clean, orderly workspace prevents spills, slips, and ruined wood surfaces. Take your time setting up so every step runs without trouble.
Pro Tip: Keep carbon steel wool far away from damp, bare oak boards. Tiny metal bits break off, rust, and leave permanent black ink marks.
The Best Way to Remove Varnish From Antique Wood
Thick, yellowed lacquer covers up the natural beauty of old timber. Machine-sanding dry varnish turns the resin gummy and ruins abrasive sheets quickly. The best way to remove varnish from antique wood is gentle softening. Softening dissolves stubborn shellac, wax, and varnish down to raw timber. It keeps the original surface flat, smooth, and free of gouges. Let gentle paste strippers do the heavy work for your arms.
Using paste rather than power sanders protects the delicate timber substrate below. This approach represents the foundation of DIY wooden furniture restoration for beginners. Your furniture retains its authentic shape, soft edges, and rich character.
Stripping Varnish and Residue Step by Step
Spread a thick, even layer of citrus paste over the finish. Cover the wet paste with plastic wrap to stop rapid evaporation. Let the formula sit undisturbed for thirty to forty-five minutes. The old finish will bubble, lift, and detach from the boards. Push the softened sludge off using a flexible, blunt putty knife. Always move your knife forward with the direction of the wood fibers.
- Apply stripper generously across two tabletop planks at a time.
- Never scrape across the grain, or you will leave deep scars.
- Wipe dirty goop off your blade into an old cardboard box.
- Work steadily from edge to center until the surface clears.
Cleaning Wood Pores With Mineral Spirits
After removing the bulk goo, wipe the surface down immediately. Dip a coarse synthetic abrasive scrubbing pad directly into clean mineral spirits. Rub along the grain to dissolve sticky residue trapped inside deep pores. This solvent wash removes all lingering wax, chemical agents, and grime. Change your cotton rags often as you wipe the solvent dry. Continue wiping until the clean cloth shows zero brown residue or dirt.
Let the bare timber dry out completely for a full twelve hours. Walk away and let the solvent evaporate from the cellular core. Rushing this drying step will ruin your fresh stain and topcoat. Use this waiting period to inspect the bare surface under bright light. You will see true wood color and any remaining finish spots. Spot-clean any stubborn varnish patches before you move to sanding.
Sanding the Table Surface Entirely by Hand
Hand-sanding is simple work that brings out deep, glowing natural patterns. Rushing with coarse grit paper will ruin hours of careful stripping work. Take a slow, steady approach to get smooth, flawless wood boards. Learning how to restore an old wooden table at home demands good technique. Sand only in straight lines running parallel to the wood grain. Circular hand motions scratch soft fibers and show through your final finish.
Sand with smooth, long strokes without pressing down on the block. Let the abrasive grit cut the timber cleanly without forced pressure. Hard hand pressure leaves uneven valleys that catch side room light.
Working Through Sandpaper Grits Correctly
Start your work with 120-grit paper wrapped around a sanding block. This grit removes light scraper marks and levels uneven board edges. Wipe the sawdust off often to check your progress as you work. Vacuum the tabletop completely before moving up to the next grit. Switch to 180-grit paper to remove scratches made by the first pass. Keep your strokes uniform, straight, and light across the entire surface.
Finish your sanding routine with fine grit sandpaper at 220-grit. This final grit closes torn grain and makes the timber feel silky. Run your bare fingers across the top to find any rough patches.
The Water-Popping Method for Silky Smooth Wood
Sanding compresses loose surface wood fibers flat against the table surface. Later, liquid stain causes these crushed fibers to swell and stand upright. That makes the stained wood feel rough, dry, and gritty. Mist the sanded tabletop lightly with clean water from a spray bottle. Let the damp wood dry naturally for about two full hours. The dry fibers will stand straight up like tiny whiskers.
Glide fresh 320-grit paper over the dry boards using zero downward pressure. This quick pass cuts off the raised whiskers cleanly and easily. Your bare timber will now feel like polished glass under your palm.
Achieving Authentic Wood Grain Restoration and Rich Color
Wood grain has unique cellular anatomy that varies from plank to plank. Proper wood grain restoration reveals stunning color depth and rich inner figure. Natural light catches the pores to create an eye-catching, luminous look. An aged old wooden table absorbs liquid stain differently along its surface. Taking the time to prep the wood ensures uniform, balanced color absorption. The natural figure will stand out proudly without blotchy, muddy spots.
Apply a light coat of wood conditioner if your table is soft. Woods like pine and cherry need conditioner to prevent ugly dark stains. Oak and walnut take rich oil stains evenly without extra prep steps.
Testing and Selecting Your Wood Stain Color
Never pick your wood stain color based on small printed paper store tags. Printed samples look completely different from actual wet pigment on raw timber. Always test stains on the underside of your tabletop first. Stir your stain thoroughly with a flat stick before applying any liquid. Settled pigments sit at the bottom and need thorough, even mixing. Testing on hidden wood guarantees you get the exact tone you want.
- Golden oak brings out warm amber tones in traditional vintage decor.
- Rich walnut adds cool brown elegance to large dining room furniture.
- Dark espresso modernizes rustic farmhouse tables with striking visual punch.
- Natural clear oil highlights authentic wood figure without altering base color.
Applying Stain Without Streaks or Blotches
Pour your mixed stain into a wide, clean metal or plastic tray. Dip a clean cotton cloth into the stain and wipe evenly. Move down the full length of each plank with smooth strokes. Work across two boards at a time to keep your wet edges moving. Let the pigment soak into the pores for three to five minutes. Check the depth of color continuously as the liquid penetrates the wood.
Grab a dry cotton towel and wipe away every drop of excess. Never leave wet, shiny pools of stain drying on the wood surface. Excess liquid turns into a gummy film that will not cure properly. Let your freshly stained boards dry undisturbed for twenty-four full hours. Keep room airflow moving to carry away lingering solvent fumes and smells. Do not touch or dust the surface while the pigment settles.
Sealing Timber for Good Using a Polyurethane Finish
Bare, stained wood needs strong protection against daily kitchen spills and heat. Without a clear topcoat, water rings and food oils soak in fast. A protective seal keeps the grain bright, clean, and totally waterproof. Applying a polyurethane finish with a cloth gives you clean, pro results. You bypass the mess, overspray, and high costs of spray equipment. Thin wipe-on layers dry quickly and level out without leaving brush marks.
This reliable step by step process to refinish a dining table works anywhere. You avoid dust bubbles and ugly drips that ruin thick brush coats. Your finished surface will look clean, deep, natural, and remarkably smooth.
Mixing and Wiping Your Protective Topcoat
Make a custom wipe-on mix using equal parts polyurethane and solvent:
- Pour half polyurethane and half solvent into a clean glass jar.
- Stir the mixture gently with a wooden stick to prevent bubbles.
- Fold a soft cotton cloth into a smooth, fist-sized wiping pad.
- Dip the pad into the jar and tap off excess liquid drips.
- Wipe along the boards from one end straight to the other.
- Never wipe over tacky areas that have already started drying out.
- Let the thin coat dry undisturbed for eight hours in clean air.
- Scuff lightly with 320-grit paper, wipe dust, and repeat four times.
Maintaining Your Restored Table for Decades
Let your final protective clear coat cure fully for seven whole days. Modern resin finishes feel dry fast, but need time to reach full strength. Keep hard objects, water glasses, and hot pans off during this time. Always place thick coasters under hot mugs and cold, sweating water glasses. Clean up dinner spills quickly using a damp, soft cotton dishcloth. Avoid harsh commercial spray cleaners that contain drying alcohol or silicone oils.
Buff the top twice a year with pure beeswax paste and flannel. Natural wax nourishes the topcoat and repels sticky fingerprints from daily use. Your table will keep its deep, warm, inviting glow for generations. Taking time to restore furniture by hand gives you great personal pride. You took a scratched, unwanted piece and turned it into family art. Pull up some chairs, share great meals, and enjoy your work.
Frequently Asked Questions
Can I restore an old table without using any chemical strippers at all?
Yes, you can scrape away dry varnish using a sharp scraper blade. Brittle shellac and ancient lacquers flake off cleanly without sticky chemical residues.
How do I safely lift white water rings from an old wooden table?
Lay a clean, dry cotton towel directly flat over the white haze. Press a warm dry clothes iron over the towel for ten seconds.
Is wipe-on polyurethane better than brush-on polyurethane for home projects?
Wiping creates ultra-thin coats that dry rapidly without drips, runs, or bubbles. Brushing often leaves visible bristles and collects dust nibs in open rooms.